The Drawing Process
I took some photos while drawing, although unfortunately only sporadically. In the future, I’ll make sure to photograph more regularly.
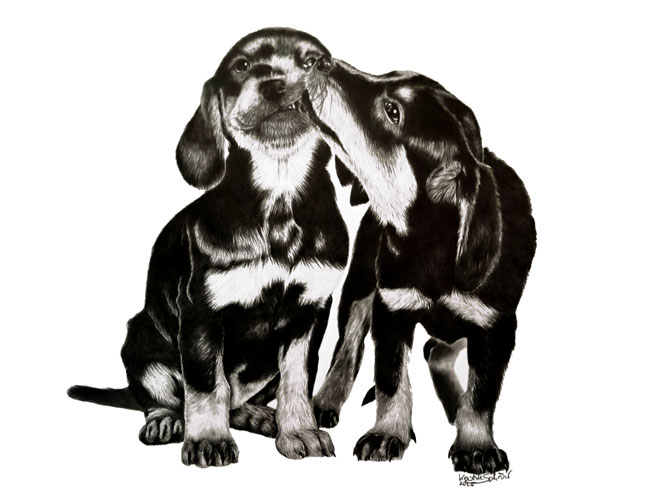
I drew two adorable puppies on DIN A3 format, using pencil. The paper I used is Fabriano Bristol, which is acid-free and archival quality. I really love working with this paper—not only because it’s pure white, but also because it feels smooth while still having a subtle texture. With Bristol papers from other brands, you sometimes get the feeling the pencil would squeak because it’s so smooth.
I spent about 35 hours on this drawing over the course of several months, since it wasn’t a commissioned piece.
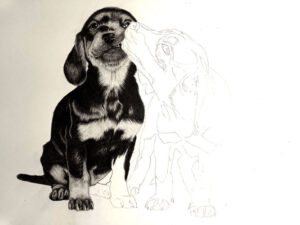
In this first photo, you can see that the first dog is almost completely drawn, while the second dog is still clearly visible as a sketch. For this piece, I made a rather detailed sketch — which is unusual for me. Normally, I only draw outlines, eyes, nose, and roughly mark important structures, mainly to make sure the proportions are right.
By the way, I don’t create my initial sketches on Bristol paper but on regular printer paper. That’s where I erase and refine the drawing. When the sketch is ready, I actually use a lightbox to trace it onto the Bristol paper. I do this to avoid erasing directly on the Bristol, because erasing can damage the paper’s texture. That damage makes the shading look blotchy and simply unattractive.
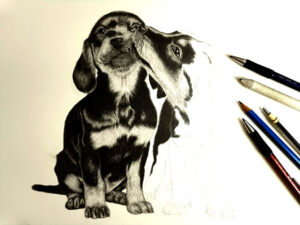
Here, I started working on the second dog. Black fur is always a bit tricky. On one hand, it needs to look nicely dark, but on the other hand, you want to see fur texture — not just a flat black area. You achieve this by layering: one layer of pencil over another, applying light pressure.
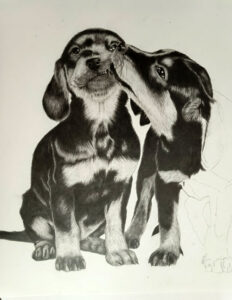
For the lighter fur areas, it’s the opposite. Even in white fur, you want to see hairs and texture. So first, I shade very lightly with gray, then erase again — always following the direction the fur grows. Afterwards, I add a few darker hairs where needed.
The hardest part is almost done here. I really struggled with the ears on this drawing, especially on the dog on the right, because you can see lots of light hairs on the ear. Light hairs in dark fur are quite tricky in pencil drawing because you can’t simply erase them. So you have to carefully plan in advance where the light hairs will be and leave those areas free at first. That means you draw the dark fur around the light hairs afterwards. And that can be a real test of patience.

And here is the finished drawing. I’ll share some tips and tricks for photographing and scanning pencil drawings in one of the next posts. There’s quite a bit to consider, since pencil tends to reflect light easily.
By the way, you’ll soon be able to purchase the original drawing or get it as a poster/fine art print.